Getting PsychXR
Preparing for Installation
PsychXR requires Python 3.6 and above, download it here. Since PsychXR will only build in 64-bit, ensure that the version of Python you install is also 64-bit.
The PsychXR installer will automatically pull any Python package dependencies, such as Cython and NumPy, prior to installation.
System Requirements
PsychXR requires Windows 7, 8.1 or 10 (Windows 10 is recommended). If using the LibOVR driver, you must install the Oculus Desktop application and have an Oculus or Facebook account. If your PC hardware configuration is supported by the HMD you are using, then it should be adequate for running solutions which incorporate PsychXR.
Installing from PyPI
The latest source and binary packages are usually made available on Python Package Index (PyPI). They can be pulled from PyPI repository automatically and installed by issuing the following command:
python -m pip install psychxr
If the binaries are not available for some reason (eg. your version of Python is too new), pip will try to build the source distribution, it will likely fail since you need to setup your build environment. In that case, see the “Building from Source” section for more information.
Installing Pre-Compiled Binaries
Pre-compiled binaries for PsychXR are available as a Wheel packages which can be installed via pip. These releases are usually newer than those on PyPI. You may download these packages from the releases page on GitHub. After downloading, you can install PsychXR with the following command (no environment variables or compilers needed):
python -m pip install psychxr-<version>.whl
Note that the pre-compiled binaries are built on Windows 10 64-bit using the MSVC++ 19.0 64-bit, supporting Python versions 3.6 to 3.9. If your configuration differs, consider building from source.
Building from Source
Usually, you can simply download and install pre-built binaries which require no additional steps like regular Python packages. However, if you plan on developing PsychXR, use preview features (e.g., OpenHMD) or wish to run PsychXR on Python versions which do not have official packages up on PyPI or GitHub yet, you will need to build PsychXR from source. Doing so requires some preparation to create a suitable build environment on your computer. However, the process to actually build PsychXR is fairly straightforward once the environment is setup.
PsychXR is (mostly) written in Cython, a superset of the Python programming language, which is used to write the interface between Python and HMD drivers. Unlike regular Python code, Cython libraries must be ‘built’ using a C++ compiler. Afterwards, they can be installed and used like any other Python library.
Note
Since the Oculus Rift on Microsoft Windows is the only supported HMD at this time, this guide will only cover building on that platform.
Setting up the build environment
If you choose to build PsychXR from source, you must have the appropriate environment setup on your computer. The software requires a C++ compiler to build. Microsoft Windows does not usually ship with the tools to build C++ applications, therefore you must use the Microsoft Visual Studio installer to get those features (the free “Community” edition will suffice). Upon downloading and running the “Visual Studio Installer” application, you will be presented with a pallet of optional features to install. Select “Desktop development with C++” feature and start the installation (see below).

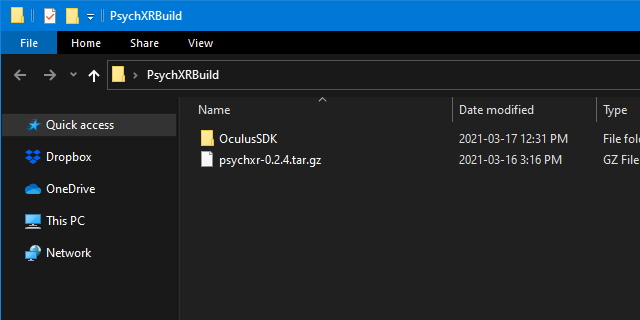
Now create a folder somewhere accessible on your PC. For this example, we’ll
create a folder on our desktop called PsychXRBuild (the full path being
C:\Users\matth\Desktop\PsychXRBuild for this example). Download the Oculus
SDK for Windows
(version v23.0 is required) and extract the contents of the zip file to a folder
inside the PsychXRBuild called OculusSDK.
Note
Due to licensing restrictions the Oculus Rift PC SDK cannot be shipped with PsychXR.
Finally get a copy of the latest source distribution package for PsychXR which can be downloaded from the releases page. Place that too into the PsychXRBuild folder. When you open the PsychXRBuild folder in Explorer it should look something like what’s shown below.
Note
If you build PsychXR using a version of the Oculus PC SDK other than 23.0 (1.55), a warning will be raised upon importing the module. The software should work fine if the SDK version is newer and has no breaking changes. However, this may result in unexpected behaviour!
Building from a source distribution
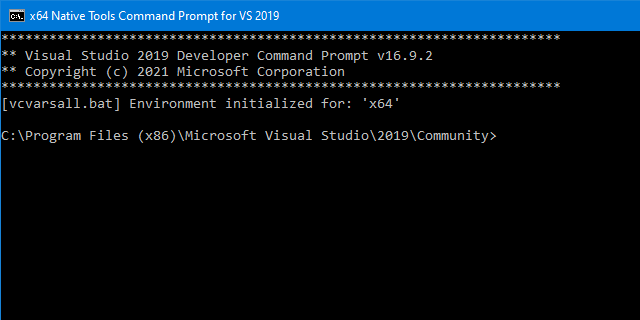
Now that we have our build environment setup, we can now build PsychXR from its source distribution. To do so, open the “x64 Native Tools Command Prompt for VS 2019” (to find it, check your Start menu under “Visual Studio 2019” as shown below).

You should see the following a command prompt appear on-screen.
Within the prompt, change the directory to the PsychXRBuild folder created earlier using the cd command, making it the present working directory:
cd C:\Users\matth\Desktop\PsychXRBuild
Now we need to configure the build script by setting environment variables. The build script needs these values to know which SDK we’re building extensions for and where any required files are located. We tell the installer to build extensions for the Oculus SDK (LibOVR) by issuing the following command:
set PSYCHXR_BUILD_LIBOVR=1
The installer needs to know where the Oculus PC SDK files are located to build
the LibOVR extension. The SDK contains files needed to compile the interface
which are provided by the manufacturer. It does this by looking at the value of
the environment variable PSYCHXR_LIBOVR_SDK_PATH. Since we placed the SDK
files in a folder called OculusSDK located inside PsychXRBuild, we simply
need to enter the following command:
set PSYCHXR_LIBOVR_SDK_PATH=C:\Users\matth\Desktop\PsychXRBuild\OculusSDK
Now we can build the source package by entering the following command (replacing <version> with the current version of the package, which is 0.2.4):
python -m pip install psychxr-<version>.tar.gz
Building the OpenHMD Extension
A preview version of the OpenHMD extension is available as of version 0.2.4 of PsychXR. If you want to try it out, you can tell the installer to build it by setting the following environment variable prior to building the source distribution:
set PSYCHXR_BUILD_OPENHMD=1
You do not need to specify an SDK of OpenHMD path as PsychXR ships with the required files and the installer knows where to find them.
Testing the Installation
If everything goes well, PsychXR should be installed and ready to use. You can test it by plugging in your HMD issuing the following command into your Python interpreter:
>>> import psychxr.drivers.libovr as libovr
>>> libovr.isHmdConnected()
True
If you have an HMD connected and the Oculus runtime installed on your PC, the above statements will result in True being returned. False is returned if you just have the runtime installed but no HMD connected. That will still indicate a successful installation. If you get any exception raised when entering the above commands, the installation has likely failed at some point.
Help! I can’t get PsychXR installed
If this happens try the above steps again or another installation method. If you are really stuck, consider submitting an issue to the project’s GitHub page detailing the steps you took and were things began to fail. It is also likely that the any difficulty encountered is not your fault and might be due to unclear or erroneous documentation. Suggestions and fixes are always welcome to make the process smoother for everyone.